Pages

Friday, February 17, 2017

All about Docker Docker Cheet Sheet by Sameera Dissanayaka

Docker Cheat Sheet

Docker Cheat sheet
By Sameera Madushan Dissanayaka

Build docker image
docker build -t Sameera/Dissanayaka .

Run Docker image
Demon mode
docker run -dt -p 80:80 docker_image_name

Intaractive mode

docker run -id -p 80:80 docker_image_name bash
when you exit docker container distroyed

Check docker images

docker images

Check running docker containers
docker ps

Checke stopped docker container and running docker containers

docker ps -a

Stop running docker container
(1234 docker container id or docker image id)
docker stop 1234

Restart stopped container 

docker restart 1234

Remove docker container

docker rm 1234

Forced remove docker container

docker rm -f 1234

Remove docker image

docker rmi 1234

Identify host and container side of docker port allocation

docker run -dt -p 8081:80

8081 container
80 hostulk

Bulk remove container 

docker rm 1234 5678 1432

Bulk image remove

docker rmi 1234 5678 1432

Access the docker container

docker exec -it 1234 bash

Remove stopped docker container

docker rm $(docker ps -a -q)

Remove all the containers

docker rm -f $(docker ps -a -q)

Periodcally remove stopped containers

Create cron job to remove all stopped containers

*/30 * * * * docker rm $(docker ps -a -q)  >> /var/log/docker_removed.log

Inspect the docker container

docker inspect 1234

Check IPAddress of container

docker inspect 1234 |grep IPAddress

Link docker container db container to container mywebcontainer

docker run -d -p 8081:80 --name sameera --link db -t mywebcontainer

Change docker image name container abc in to sam

docker tag abc sam

Shared container folder with host

docker run -dt -v /var/www/hostside:/var/www/containerside  name_of_image

Shared Container

docker run -d --volumes-from nameofcontainer -- db docker_image_name

To Be Continued ....


How to get free SSL certificate

Get free ssl certificate on apache server on Debian

1. Go  to https://certbot.eff.org  and select OS type and web server

2.Ex:- Apache on Ubuntu 16.04 
Install sudo apt-get install python-letsencrypt-apache

3.Generate certificate and insert into apache 
letsencrypt --apache
4.Automate renewal
Let’s Encrypt Certificate last for 90 days so after 90 days it should be renew
Add cron job  letsencrypt renew


How to add free SSL cert to nginx on amazon aws AMI

First download certbot and change write permission
wget https://dl.eff.org/certbot-auto
chmod a+x certbot-auto
./certbot-auto
./mention installed path /certbot-auto certonly
./mention installed path /certbot-auto certonly --standalone -d yourwebsite.com -d yourotherwebsitedomain
Certification is valid for 30 days
Test automatic renew using
./mention installed path /certbot-auto renew --dry-run
add cron job to execute relevent time
./mention installed path/certbot-auto renew --quiet 


Sunday, July 17, 2016

How to create Video Upload API using Python Flask Dockers Apache2 Nginx Reverse Proxy SSL Lesson 1

Python Flask Video Upload API

#python #flask #pythondockers #pythonnginx #pythonapache2reverseproxy #pythonnginxreverseproxy #ubuntudockers
Hello and welcome to my blog.Today onwards we going to start a new journey.I'm going to teach you How to build complete video upload REST API using python flask.
so stay with me.
Here is the plan of this lesson series.around 50

  1. Introduction of the project and Setup our working environment.
  2. Create User Registration System using Python Flask.
  3. Create email Sending API for user verification Using Python Flask.
  4. Create API for verified user Identification Using Python Flask.
  5. Create API for user Login Using Python Flask.
  6. Create API for change user email using Python Flask.
  7. Create user email change email sending API.
  8. Create video upload API.
  9. create view uploaded video API.
  10. Change uploaded video details API.
  11. Delete uploaded video API.
  12. Apache reverse proxy.
  13. nginx reverse proxy.
  14. Create docker image from docker file.
  15. Create docker container from docker image.
  16. Create mongodb docker image.
  17. Link web service docker and mongodb docker.
  18. Change host file in ubuntu.
  19. Create virtual host in apache2.
  20. Create virtual host in nginx.
  21. Use unix socket insted of the tcp socket nginx.
  22. Install uwsgi and run flask app.
  23. Create wsgi and run flask application using wsgi.
  24. Commit docker.
  25. Rename docker.
  26. Restart docker.
  27. Stop docker.
  28. Restart docker.
  29. Remove docker image.
  30. Remove docker container.
  31. Stop all running docker container in one click.
  32. Remove all stopped container in one click.
  33. Use https for the flask application.
  34. Redirect http to the https in nginx
  35. Launch flask app to google app engine.
  36. Use single run command in docker file.
  37. Restart flask app if it is crashed.
  38. Run flask app using shell file.
  39. Run flask app using shell file with nohup command.
  40. Create non root ubuntu account to build and run docker image.
  41. How to run any file when docker container start.
  42. Build and run docker container and run video upload web service inside the docker file using one shell script.
  43. Use advance rest client to check your web service.
  44. Use postman to check your web service.
  45. Use curl to check your web service.
  46. How to use GET request to check your web service.
  47. How to use POST method to send request to your web service.
  48. How to use form encoded for send request to web service.
  49. How to solve url character limited nginx.
  50. How to solve apache errors.
  51. How to get POST and GET method both in flask application.
  52. What is IBM Bluemix.
  53. How to deploy docker image to IBM Bluemix. 
Plase share and comment.Have a good day


Tuesday, February 23, 2016

How to Hide Files in Windows System Using ADS(Altanate Data Stream)

How to Hide File Using Python 

Alternate Data stream is a substructure of a NTFS file system.Alternate Data Stream(ADS) can not  detect by common software or tools and it is attach with normal file or folder in hidden layer.

File Data and Attributes <--> Default Data Stream <-->Altanate Data Stream

so first create folder and inside that folder create python file name hide.py and also create text file hello.txt and also add image file photo.jpg we are going to hide this photo.jpg file inside the hello.txt file

What things we need to hide file using python
[+]install python 2.7 to your windows computer
[+]install pyADS 
open command prompt and type 
pip install pyADS


then it will install pyADS for you 
ok now open hide.py file in text editor or python IDE.i use pycharm

then type
import argparse
from pyads import ADS
we use argparse to get user input in command prompt

then create our main function
 def Main():
and create variable name parse and then it take input from argparse method
parser=argparse.ArgumentParser()
then we can get user input to scan for ADS files
Add file to ADS
Remove file from ADS
Extract ADS file

parser.add_argument("file",help="Specify File or Directory")
parser.add_argument("-o","--output",help="Print output to terminal",action="store_true")
parser.add_argument("-a","--add",help="Add stream to <file>",type=str)
parser.add_argument("-e","--extract",help="Extract All",action="store_true")
parser.add_argument("-r","--remove",help="Remove All",action="store_true")
 
Whole Program
import argparse
from pyads import ADS


def Main():
    parser=argparse.ArgumentParser()
    parser.add_argument("file",help="Specify File or Directory")
    parser.add_argument("-o","--output",help="Print output to terminal",action="store_true")
    parser.add_argument("-a","--add",help="Add stream to <file>",type=str)
    parser.add_argument("-e","--extract",help="Extract All",action="store_true")
    parser.add_argument("-r","--remove",help="Remove All",action="store_true")

    args=parser.parse_args()
    if args.file:
        handler=ADS(args.file)

        if args.add:
            handler.addStream(args.add)
        if handler.containStreams():
            for stream in handler.getStreams()[:]:
                if args.output:
                    print(args.file+":"+stream)
                if args.extract:
                    fh=open(stream,"wb")
                    fh.write(handler.getStreamContent(stream))
                    fh.close()
                if args.remove:
                    handler.removeStream(stream)
    else:
        print(parser.usage)


Main()
Lets try it
hide file inside
see text file size is 0byte


 open folder and type cmd then it will open Command prompt from there
so type python hide.py hello.txt -a photo.jpg 


now it will combine the photo inside the text file we can check it using python hello.txt -o to scan the ads file see now photo is inside the text file.

now we can check the text file size it is still 0byte

so we can delete the photo.jpg 

now let's recover our hidden photo from text file
python hide.py hello.txt -e


this will extract photo.jpg from hello.txt file 

i hope you would enjoy this tutorial.if you are like this post please share with your friends.

Commands

python hide.py hello.txt -o  To check is there any ADS files
python hide.py hello.txt -a photo.jpg to hide photo inside text file
python hide.py hello.txt -e to extract photo from text file
python hide.py hello.txt -r to remove photo from text file
if you have face error add pyads file to same folder
download


Android Studio not Open After Installing

android studio java.lang.RuntimeException: java.lang.IllegalArgumentException: Argument 


if you are try to install and open android studio for the first time sometimes you may have face to this error .
i also face the same problem .here is the tip for solve the this error and have fun with android app coding

there is two things you can solve the problem
1.disconnect your internet connection and close your android studio and restart android studio.this will help to solve problem
2.Go to android studio Bin folder where you have installed android studio.

and open bin folder there is file name idea.properties 

copy that file to your desktop because that will not edit there and save there.so open copied file in desktop through notepad
then at the end of line add 
disable.android.first.run=true at the last


then save file .make sure save as all files otherwise it will save as text file

then copy and replace the file in bin folder
 then run android studio it will works well now
if you are like this post please comment bellow .and share with your friends

How to install Selenium in python Windows PC

Install Selenium in Python 2.7 For Automation

Selenium is the web driver use for use Test automation.Selenium can use for most of the testing and Automate the software product.and also this can be use for automate the boring stuff with your programming knowledge.in next tutorial im going to teach you a how to automate the LinkedIn Profile views and increase the you are getting job.and expose your LinkedIn profile to others.so before we are going to do that we have to install selenium web driver to your computer.
you will need python 2.7 in your computer
and you need PIP for this python installer package 
open command prompt and type
 pip install selenium
you can activate the pip using add C:\Python27\Scripts line to your environmental variable.see my previous post for how to do this


If you are like to this post Share and comment

How to enable dot net 3.5 (dot net 3.0 or dot net 2.0 ) offline

Install dot net 3.5 framework offline

when you try to install new software in windows 8,or windows 8.1 or windows 10 you will face this problem because windows 8 or 10 does not include the dotnet 3.5 framework.so there is option ,either you have to download dot net 3.5 framework and install it.but do you know if you have windows 8,8.1 or windows 10 DVD or iso file you can easily install dot net 3.5 framework offline
it is simple
 fi you have windows DVD put dvd in to laptop and it will mount .
when the dvd is mounted there is folder called Sources-->SXS
in my laptop it mounted as Drive Letter E so the pasth is
D:\sources\sxs

so open command prompt in administrator mode. you can do this press windows key on keyboard and type CMD. then it will show command prompt then you can right click on common prompt and provide run as administrator

in this command prompt type
Dism.exe /online /enable-feature /featurename:NetFX3 /All /Source:D:\sources\sxs /LimitAccess,

then it will automatically install dotnet 3.5 framework for you.

I hope this article will help you to solve your problem
if you are like this post please share with your friends.

Sunday, September 13, 2015

Convert python 2.7 code into Python 3.4 code

Convert python 2.7 into Python 3.4

Hello and welcome in this tutorial im going to teach you cool trick.how to convert the python 2 script in to python 3 script it is easy.
here is the step im going to do
create new folder in desktop
then save my python 2.7 file in that folder
then select the folder that i created before and press shift and then press right click it will ask for open command prompt here select it and boom then it will open the command prompt
 after that you have to type like this
python C:/Python/Tools/scripts/2to3.py then your file name
ex:-
python C:/Python/Tools/scripts/2to3.py mypythonfile.py

then press enter then it will show you the points you need to change [-] mark will represent the changes you wanna do.
or you can make the changes automatically you can type -w before your file name then it will automatically fix the errors for you

python C:/Python/Tools/scripts/2to3.py -w myfile.py

here is my python 2.7 file  
i saved in new folder in desktop
Press Shift and press right click to open command prompt in that folder

check corrections


errors are marked


Errors are fixed using -w command


Errors are fixed now


lets see the new changed code

Lets run the code and see the result


Monday, September 7, 2015

How to uninstall Django completely

pip uninstall

in this tutorial im going to teach you how to uninstall Django from your computer completely

open command prompt and type
pip uninstall django

this command completely remove django from your computer

How to uninstall Django version and install specific version

pip install package==version

in this tutorial im going to teach you.small tip how to install specific  version using pip install

first you 
you have to type
pip install package_name==version number
as example pip install django==1.6.5
that's it it will install the specific version


to check the version of the django you can open python shell and type
print(django.get_version())


Sunday, September 6, 2015

How to install sqlite3 on windows computer

Install sqlite3 on windows 10

when you are try to work with django .you need to have database sqlite3 is simple light weight database .you can check if your computer already have sqlite3 or not.
 open command prompt and type sqlite3

 if it shows error massage then you can go to sqlite3 website and download precompiled Binaries  and dll file and download the two zip file and unzip it.

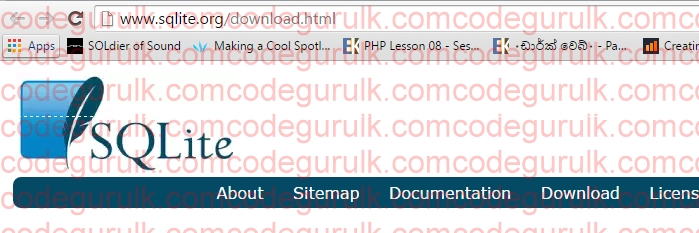
 sqlite download page
precompiled binaries for  windows

 unzip files

inside ziped dll files

 copy all 3 files in to system 32 folder
 and copy both files and past in your computer system 32 folder 
thats it now open command prompt again and type sqlite3 it will show message like this now you have sqlite3

How to check how many python packages install in computer

pip freeze

hi there in this tutorial im going to teach you some small tip to check how many python framework installed on your computer

open your command prompt and type
pip freeze
 hit enter
it will show how many python frameworks are installed in your computer


How to install Django on windows Lesson 1

pip install Django

Hello there today i'm going to start new tutorial seris about python web framework called Django. most of major websites are created using Django as example pinterest.com,Disqus,Bitbucket
today we are going to start our first step.
lets install django on our windows machine

open command prompt and type pip install django it will automatically install the django and its dependencies


Friday, September 4, 2015

Python For Beginners Lesson 4 Numbers

Python Numbers

hi in this tutorial im going to teach you about numbers in python
go to start menu and type python and then you can see python IDLE its built in python editor
it can identify python data type and variables automatically.in python IDLE
type

5+5 then enter it will give out put as 10


 and also you can multiple numbers
type 20*5 it will give 100


if you type 6+4*10 it will give output as 46 but why its not 100 because it follows basic maths order
it consider maths functions as this order  (),/,*,+,-


and also you can divide numbers 19/5
answer is 3.8

 if 19//5 it will give rounded value and it will drop the decimal point

if you want remainder you have to use % mark
like 19%5 it will give remaining value 4

you can get power  or exponent like this 10*10*10 
or even get the same result easily using ** mark 

or even you can assign variable and values and add them together
sam=20
madu=10
sam+madu answer is 30

i hope you have learn something from this tutorial if you have any question please leave a comment below
have a good day


Python Beginner Tutorial Lesson 3 Install PyCharm

Install Pycharm

hello in this tutorial im going to teach you about install python editor called pycharm
it is easy way to edit and create python application.
first you need to download pycharm from
https://www.jetbrains.com/pycharm/download/
 after that there is linux,windows and mac os version dowload installer as your requirement
after that install as normal program.then it will automatically detect your python version
after that you are ready to go

How to install .whl extention package in Python

How to install .whl extention package in Python

hello friends today i'm going to teach you how to install python modules in .whl extension
its easy first go to command prompt (use can press windows key and type cmd in start menu)
after that chage your directory to where you have that .whl file actually .whl extension refer to wheel .
you can use cd command to change directory in command prompt
i have my kivy.whl file in drive D so i have to change my drive using cd  or D: command
after that type pip install yourwhlfilename and extension
then enter.
then it will install that module for you


How to Run Python on Android Device

How to Run Python on Android Device QPython and Kivy

Hello friends how are you .hope you are fine.in this tutorial im going to explain about how to run python code on android devices.there is android app called QPython.using this application you can code python code when you are in on the go.if you are serious python lover.you can code and run python script as hobby using your mobile phone or tablet.
here is the link for google play store
https://play.google.com/store/apps/details?id=com.hipipal.qpyplus&hl=en

 and also you can use Kivy .i hope to start kivy tutorials soon.using kivy you can write mobile application using python.
you can find more information about kivy http://kivy.org/

here is how to run helloworld using python in my mobile phone